Creating a laptop development environment with the power of a desktop PC
We will be setting up a remote VSCode environment that can be accessed anywhere with Tailscale.
TLDR
I rock a 9 year old Acer Aspire S13 laptop, which means I get:
- 4-thread 2.5 GHz Intel Core i7-6500U
- Integrated graphics
- 6 hour battery life
- Not much else
However, I still need that machine learning ompf that I get from my desktop pc during my university trips, and so my solution was to use Tailscale + VSCode remote explorer to hook them up.
The Setup
To replicate my setup, all you’ll need is:
- The Client computer (the one that you’ll be coding on, eg: a laptop)
- The Host computer (the one that you wish you were coding on, eg: a desktop)
The Host must have a ssh server running. If you can run
ssh your-host-username@localhoston the Host, then you should be golden! See my setting up ssh guide if you need more help.
Tailscale
Here we are just going to be installing and setting up Tailscale on both devices. Repeat the following for both machines:
- Sign into tailscale.
- Install tailscale
- Run
sudo tailscale up --hostname=followed by eitherclientorhostdepending on which one you are running it on. You should see something like:
To authenticate, visit: https://login.tailscale.com/a/whatevercode
- Click the url to add the device to tailscale under your account
And thats it! That should be the hardest part of the setup. What we’ve done is allowed our computers to find each other even if they are not on the same network.
To test this connection, you can try ssh-ing into the Host from the Client with the command: ssh your-host-username@host. If this fails, then you might need to go to the tailscale dashboard and check for any errors or change the device names.
You should up up with something that looks like:

VSCode
This will be the ‘developer environment’ that will be shared between the two computers. Make sure to install VSCode on both the Client and Host.
Then for both the Client and the Host (with vscode open):
ctrl + p, and run the command:ext install ms-vscode-remote.remote-sshctrl + pagain, but now run:ext install ms-vscode-remote.vscode-remote-extensionpack
This will install the nessesary extensions that will allow us to use the Host as a development environment on our Client.
Remote Explorer
Now we can actually start a connection between the Host and Client.
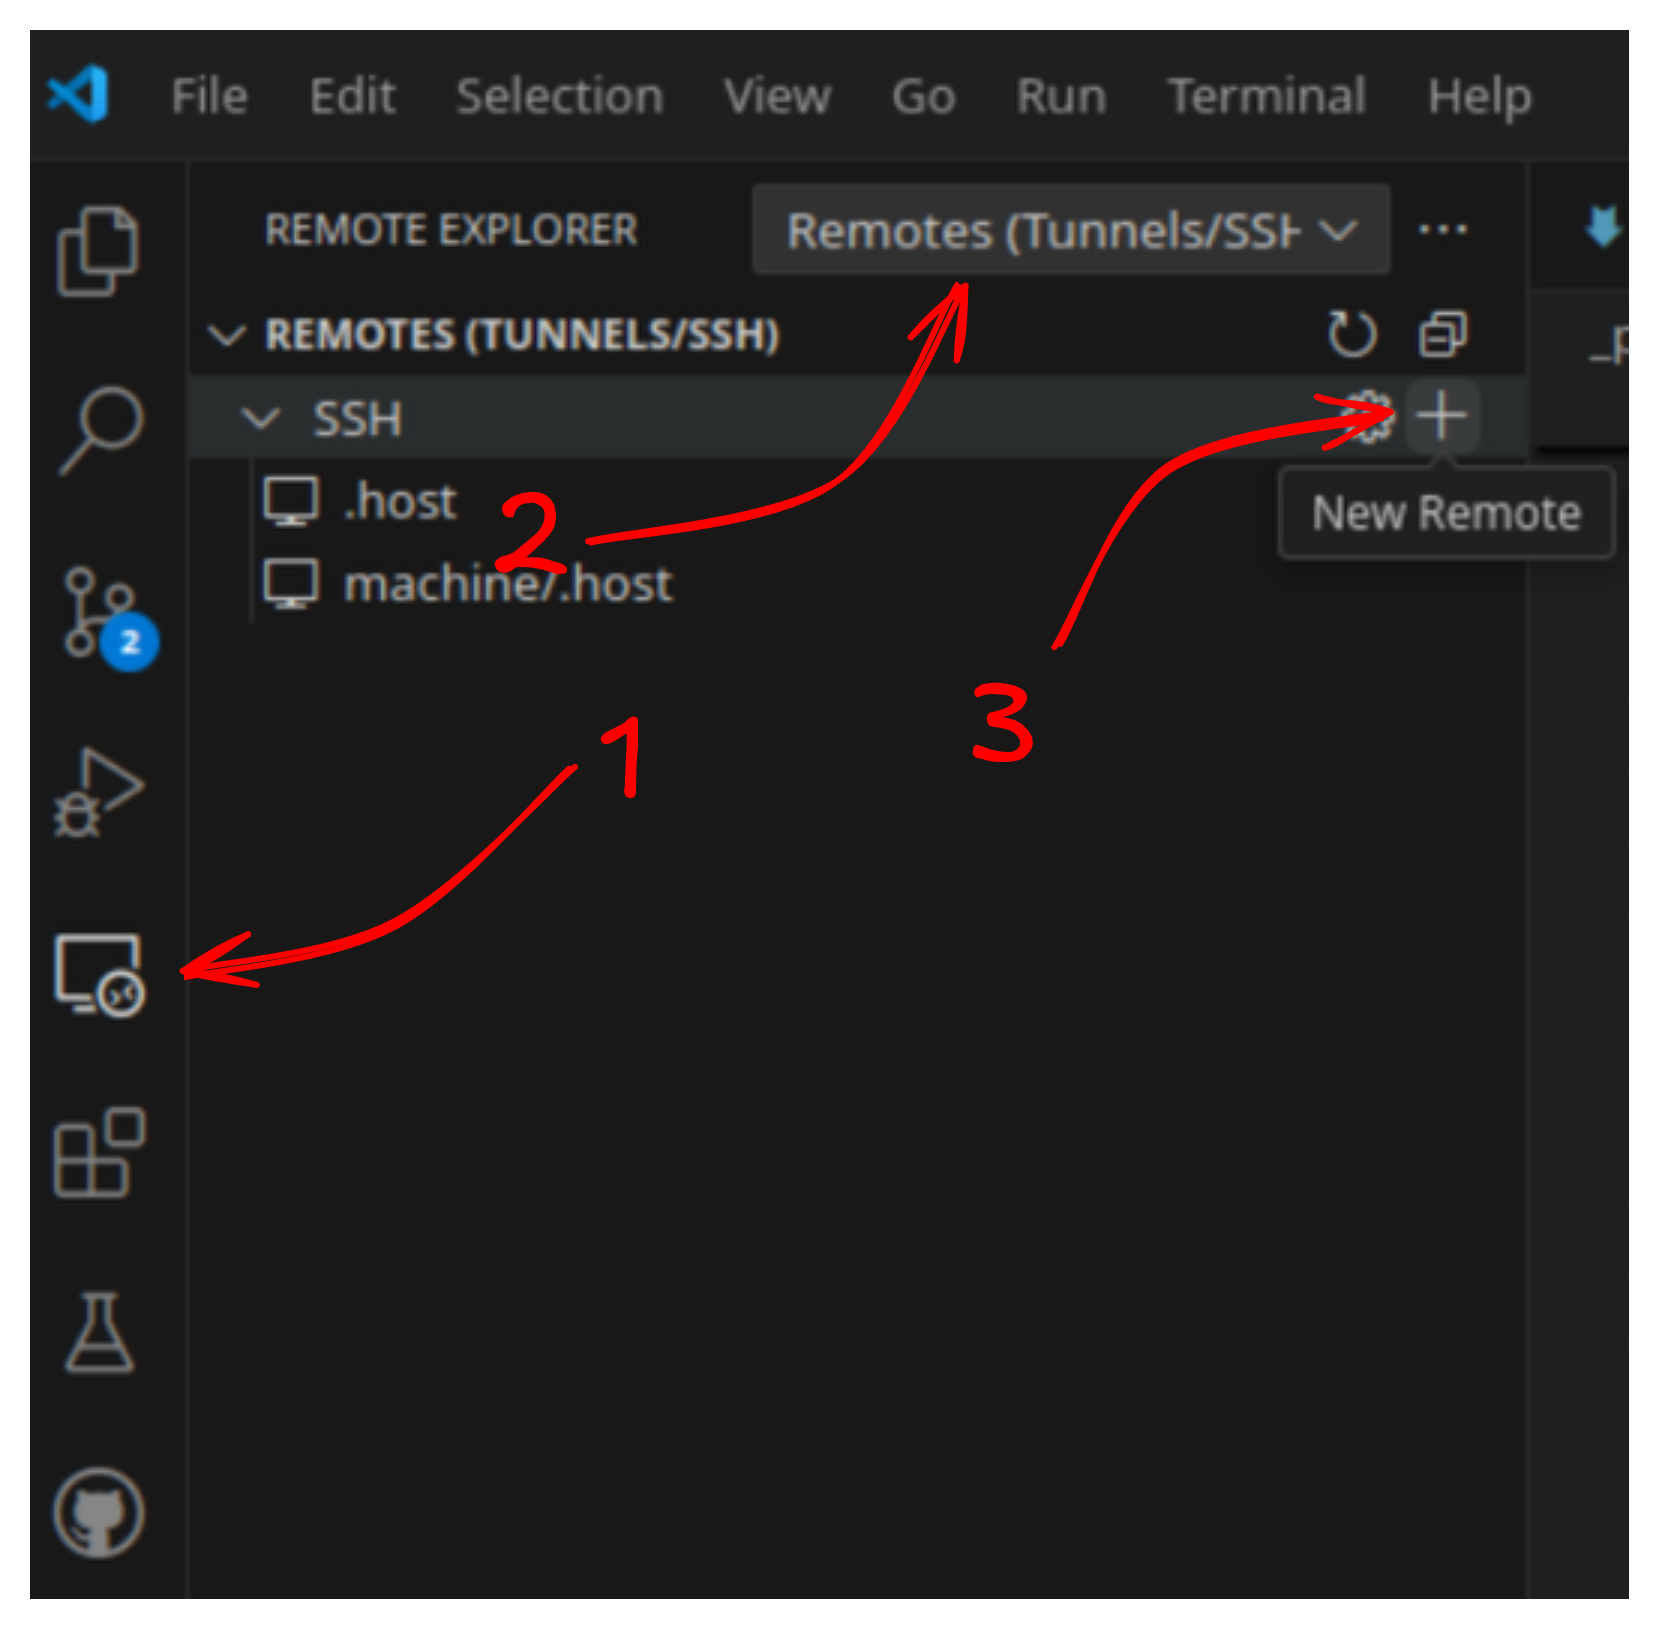
First (on the Client computer), you need to open the remote explorer tab, select the ssh remote option from the drop down menu, then New Remote.
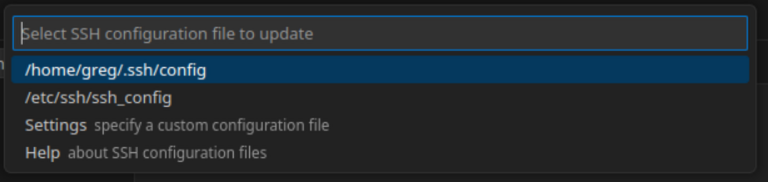
Then, a new popup should appear, in which case you should type: ssh your-host-username@host to configure our extensions.

Once you press enter, a new popup will appear. Simply select the default host file (just press enter).
Then start the connection to the Host.
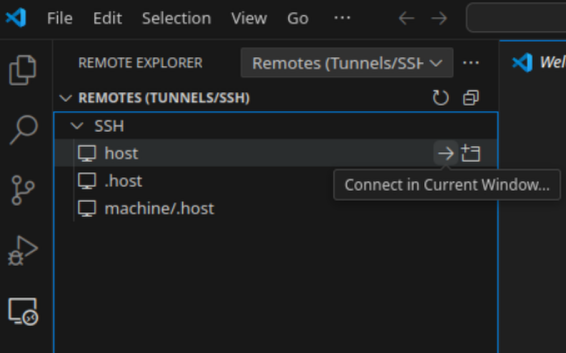
After entering your password, you can finally use your Host's instance of vscode as if it’s running locally! Click Open Folder and navigate to your project directory.
Limitations
The biggest limitation is that if you want to have more clients, you’ll need to setup tailscale for each device. Otherwise, there’s practically zero drawbacks!
Tips & Tricks
Setup a ssh key so you don’t have to use your password. Assuming you’re using Linux, on the Client, type
ssh-keygen(just press enter for all the options), thenssh-copy-id your-host-username@hostand passwords-be-gone!You can have multiple clients connected to one host, but I recommend renaming all your devices from client/host into something more useful (you’ll need to go though the Remote Explorer setup again).
Tailscale is super versatile! I personally run it on my homelab so I can access my services at uni without needing to deal with port-forwarding (it also can act like a VPN).
A more mainstream approach might be with VSCode tunnels. The end result is almost exactly what we have here, but it unfortunately has a lot more limitations when compared to Tailscale.
Conclusion
Hopefully this blog helps out with your portable programming adventures!